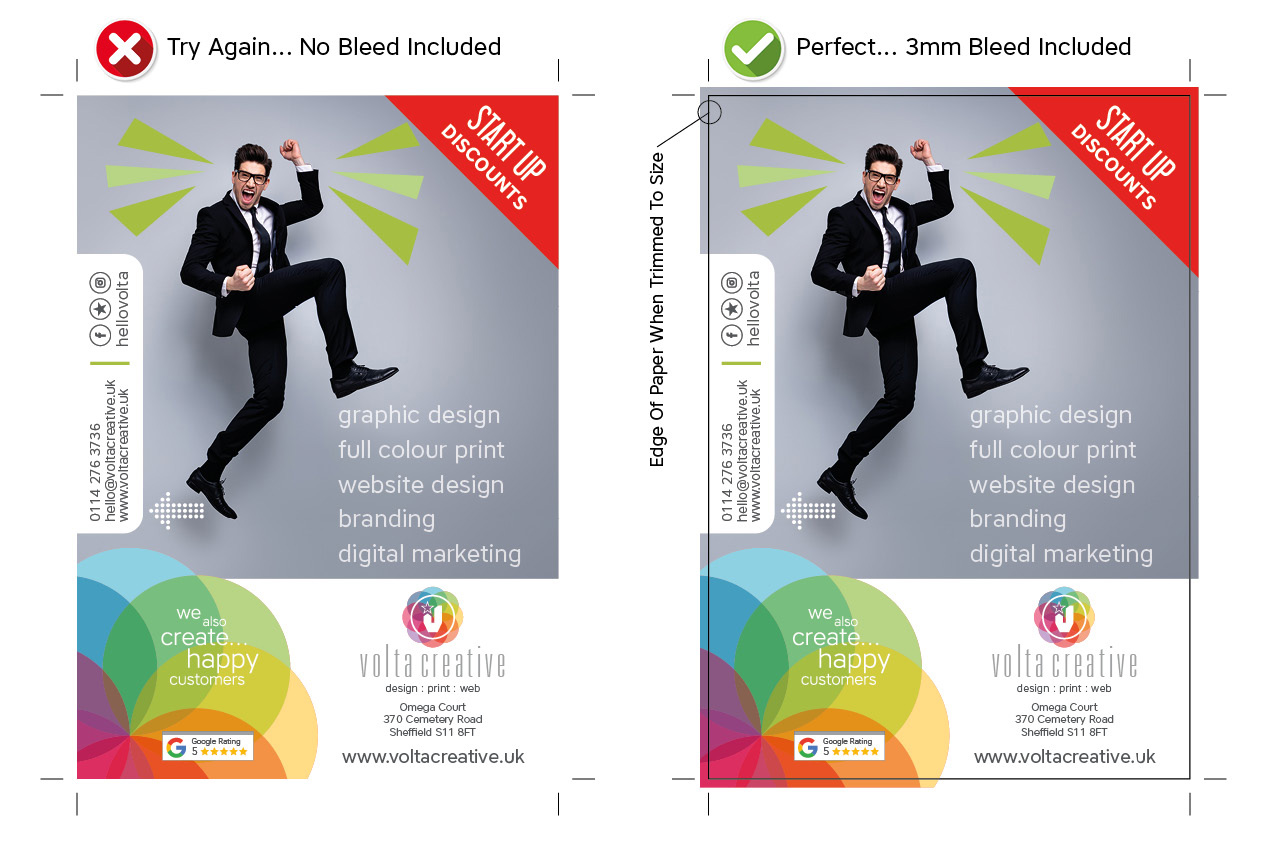
How to add bleed to a print job
So you want to know how to add bleed to a print job?
Although we provide the design and artwork for the vast majority of print jobs, just occasionally a customer needs to supply us with finished artwork and it’s usually adding bleed which causes a little confusion.
First things first, what’s bleed? It’s like giving your design a little breathing room. Bleed ensures that when your amazing creation gets printed and trimmed, there won’t be any annoying white edges. We want your masterpiece to go right to the edge of the paper, after all!
Here’s the step-by-step on adding bleed:
Open Your Design Software:
Fire up your design software of choice. Whether it’s Adobe InDesign, Illustrator or something else, the process is pretty similar.
Set Up Your Document:
When creating a new document or opening an existing one, find the option for document setup. Look for dimensions – that’s your page size. Now, here’s the trick: add a little extra to those dimensions for bleed. Usually, 3mm is the accepted standard for commercial print.
Activate the Bleed Option:
Some software has a specific bleed option in the setup. Activate it! If not, no worries – just manually add the extra dimensions you decided on in the previous step.
Design to the Edge:
Now, when you’re creating your design, make sure any colours, images, or elements you want to reach the edge extend into that 3mm bleed area on all sides. It’s like creating a safety net for your design.
Export with Bleed:
When you’re ready to share your creation with the world, go to export or save options. There should be a box or setting that says “Include Bleed” or something similar. Check that box, and you’re good to go.
High-Five Yourself:
You did it! Your design is now bleed-ready and primed for printing without those pesky white borders meaning we can print your job with no issues.
Remember, adding bleed ensures your print item looks its absolute best. So, go ahead, unleash your creativity, and let that design fly off the page (right into the bleed area)!
If you have any questions, we’re here to help. Now you know how to add bleed to a print job… Happy designing!
